Pictures can make a presentation interesting. When inserting a picture into a PowerPoint slide, you might want to eliminate any unwanted portions and focus on a specific area or you can also crop the picture into a shape. However, you can easily achieve this using the PowerPoint crop tool.
Insert Your Picture or Image First:
Before cropping, we first need to insert pictures into our PowerPoint slide by selecting the ‘Insert’ tab and clicking on the ‘Pictures’ option. Otherwise, you can even copy-paste or drag-and-drop images as well.
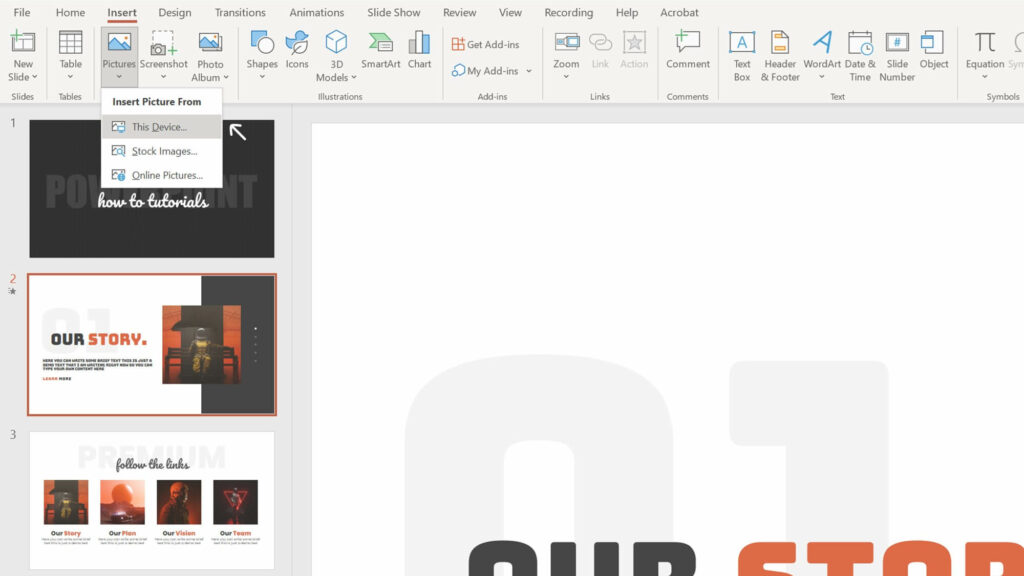
Let’s Crop the Inserted Picture:
You can crop a picture by selecting it manually or using the crop-to-shape option. Below, we have discussed both options.
Method 1: Crop Manually
Step 1: Go to the Picture Format Tab
First, select the picture that you want to crop, and go to the ‘Picture Format’ tab (this tab only appears after selecting a picture).
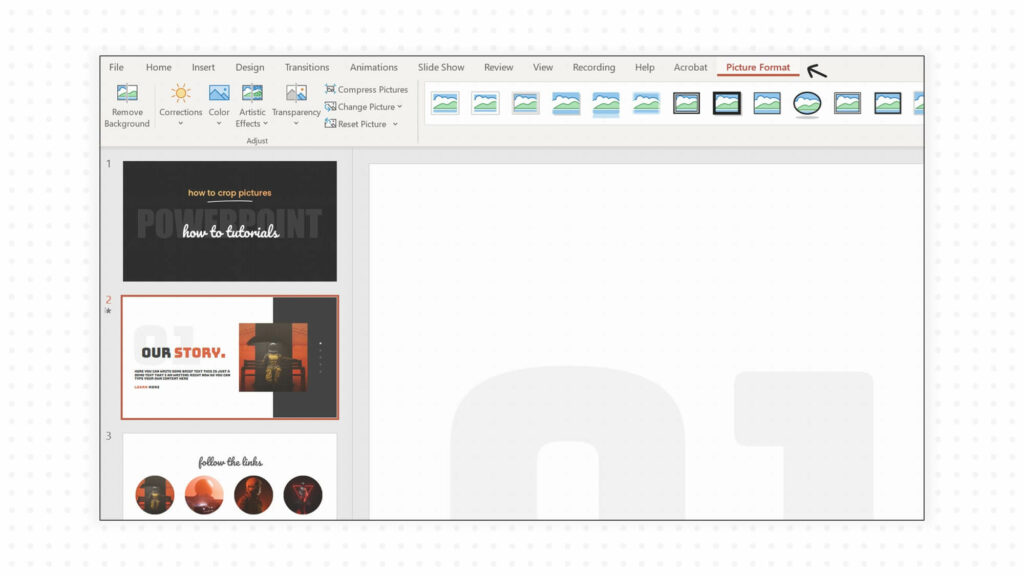
Step 2: Use the Crop Tool
Under the picture format tab, click on the ‘Crop’ tool option.
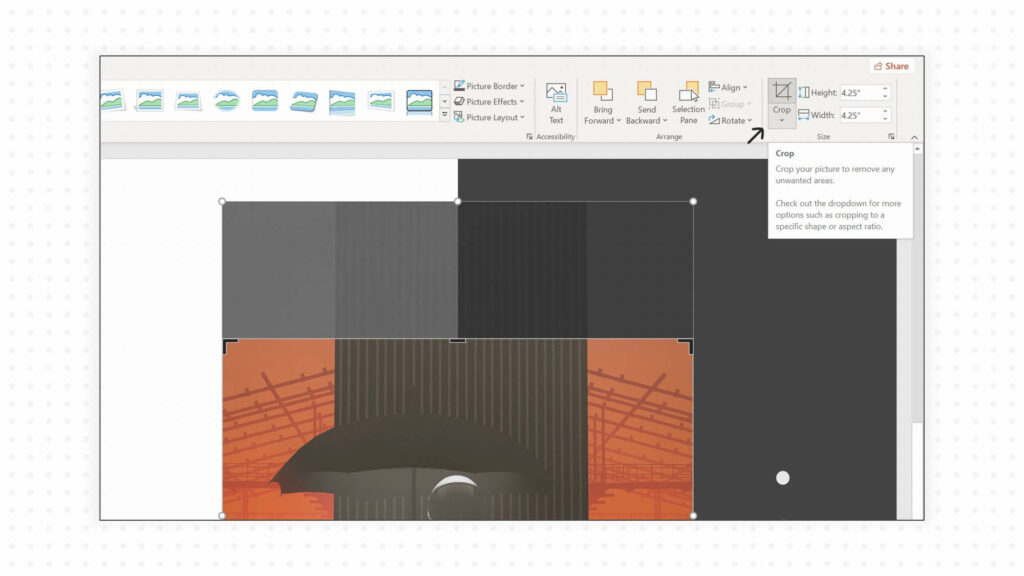
Step 3: Adjust the Cropping Handles
Adjust the ‘cropping handles’ by dragging from any side or corner. Using these handles you can easily eliminate any unwanted areas from the picture.

Step 4: Exit from the Crop Tool
Once you are satisfied with cropping press ‘Enter’ or click outside of the picture to finish the process. However, you can make further adjustments, by going back to the crop tool.

Method 2: Crop to Shape:
Click on the dropdown arrow from the ‘Crop’ tool and select the ‘Corp to Shape’ option. A full list of available PowerPoint shapes will appear that you can select to crop the picture accordingly.
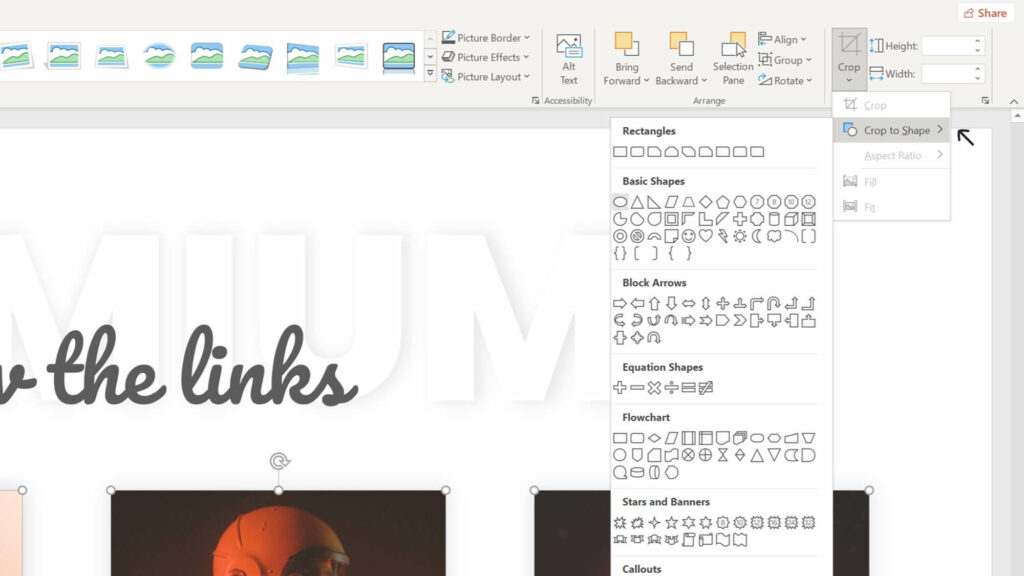
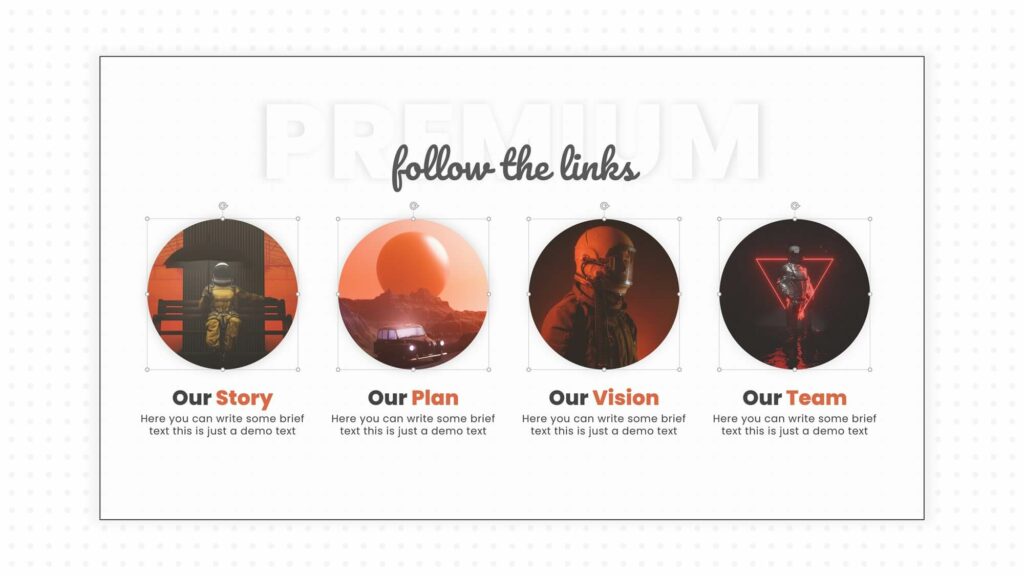
Method 2.1: Let’s crop the picture to a circle shape
Here, we have selected an oval shape with a 1:1 aspect ratio to get a full circle crop for the selected pictures.
Method 2.2: Let’s try to crop to a flowchart shape
For example, here, we have selected another shape from the flowchart section to demonstrate how it crops our pictures.

Crop Picture by Aspect Ratio:
Selecting the right aspect ratio is very important when using the “crop to shape” tool. For example, if you want to keep a square crop selection, choose a 1:1 aspect ratio. Additionally, there are other aspect ratios in the ‘Portrait’ and ‘Landscape’ sections that you can explore as well.

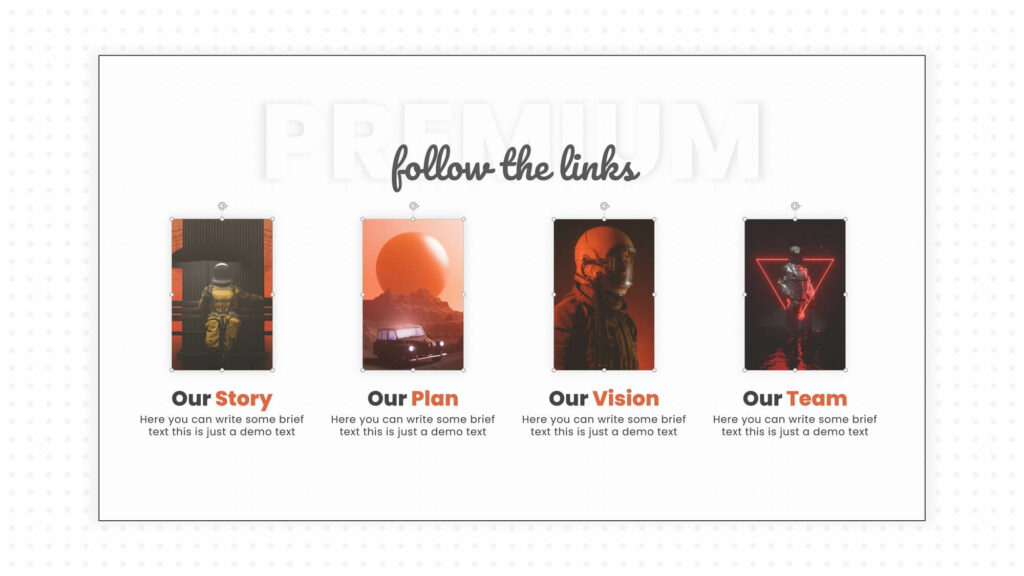
Demo Slide with 2:3 Aspect Ratio:
Here you can see one of our demo slides where we have cropped the pictures with a 2:3 aspect ratio.
Create Image Placeholders in PowerPoint
Using shapes, you can create custom image placeholders. We will cover this topic in another detailed article to teach how to crop pictures using custom shapes or create custom image placeholders in PowerPoint.
Get a Printable PDF of this Article
Similar to our other PowerPoint how-to articles, you have the option to download a printable PDF of this easy-to-understand step-by-step guide on how to crop a picture in PowerPoint.
Frequently Asked Questions
Here we have tried to answer some of your questions on how to crop a picture in PowerPoint.
Can I take a screenshot in PowerPoint?
To insert an image in PowerPoint, you can use the built-in ‘Screenshot’ tool to take a screenshot located under the ‘Insert’ tab in the ‘Images’ block. This will allow you to directly insert a screenshot of any open window on your device, or manually select and capture a specific part of the screen using the ‘Screen Clipping’ option. We will cover this topic in detail to provide step-by-step instructions on how to take screenshots in PowerPoint.
Can I remove the background from a picture in PowerPoint?
Yes, you can remove the background from a picture in PowerPoint. Simply go to the ‘Picture Format’ tab, where you will find the ‘Remove Background’ option. This tool can easily remove any simple background but for more complex backgrounds, you need to adjust additional settings, which we will cover in another how-to PowerPoint article.
Buy Me a Coffee
Become a Sponsor and Support Our Creative Journey.
Hey there! This is Team PowerPoint School. You can support our work by sending us a cup of coffee and get access to all our premium templates.


Leave a Comment