In most cases, we use pictures or images to make our PowerPoint slides more visually appealing and engaging for the audience. Adding pictures to PowerPoint is an easy task. In this article, we will discuss the different methods that you can use to insert pictures in your PowerPoint presentation slide, as well as some best practices to follow. Additionally, we will share some resource links where you can find high-quality images to use in your presentation.
Methods of Inserting Pictures in PowerPoint:
There are two ways to insert pictures in PowerPoint: manually through Insert > Picture or by copying & pasting or dragging & dropping onto a slide.
Method 01: Copy & paste images
One of the easiest ways to insert a picture is by copying it by using CTRL+C (for Windows) or⌘ + C (for Mac) and then pasting it with CTRL+V or⌘ + V onto the slide. Alternatively, you can also drag and drop the pictures into the PowerPoint slide as well.
Method 02: From insert pictures
To insert pictures in PowerPoint, you can navigate to the ‘Insert’ tab and click on the ‘Pictures’ option. A dropdown list will appear with three options to choose from: ‘From this device’, ‘Stock images’, and ‘Online pictures’. Simply select the option that suits you best and insert the picture into your presentation.
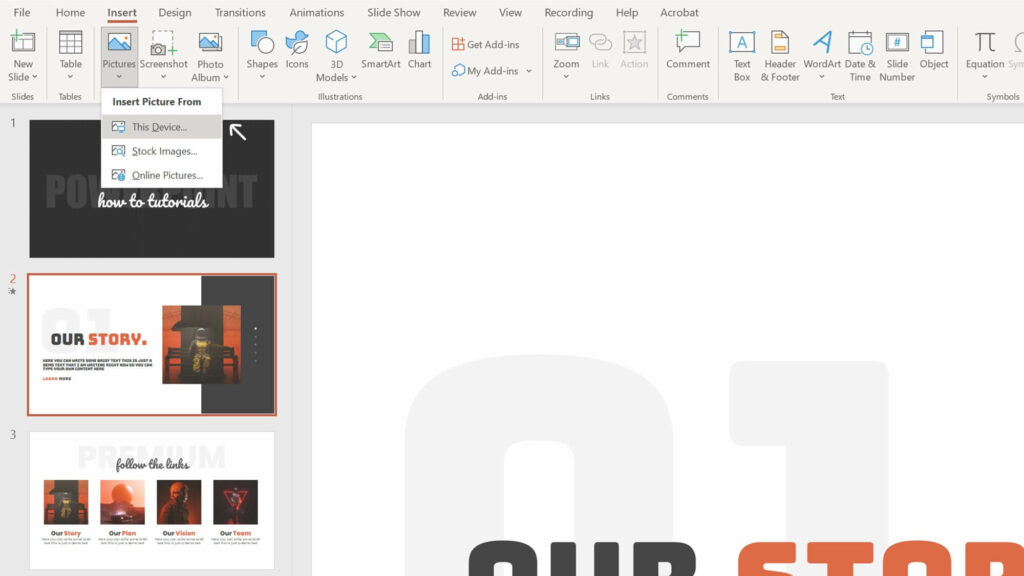
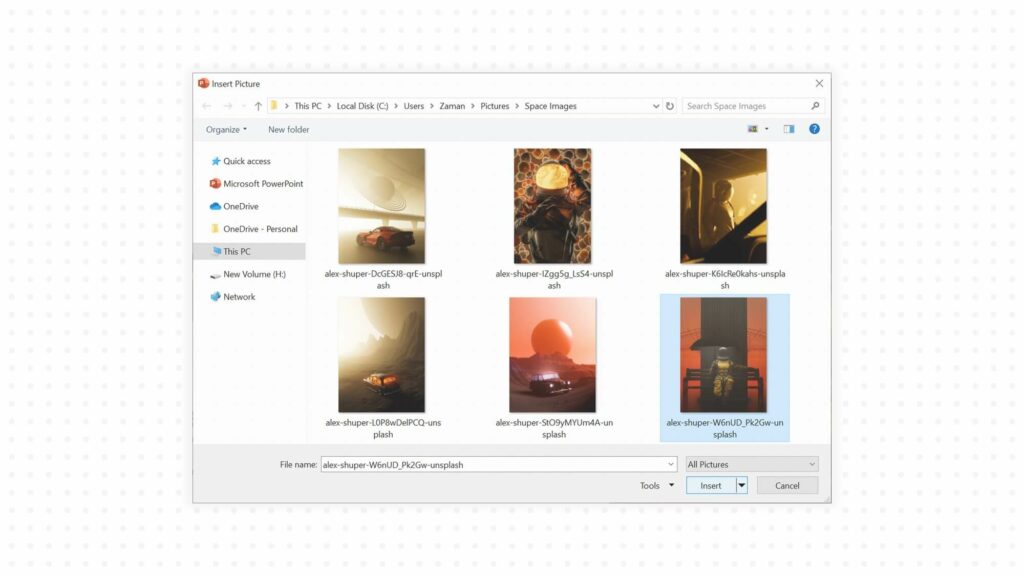
From this device: This option allows you to select images or pictures from your computer’s internal or external storage by browsing through them.
From Stock Images: If you select the stock images option, you will see a collection of available stock images. Most of these images come with a Microsoft Office 365 subscription.
From Online Pictures: You can also get access to Bing images.
Sample Slide After Inserting Pictures:
Let’s take a look at our sample slide that contains four different pictures alongside text boxes. It is just to give you a rough idea of how you can insert and organize pictures in a PowerPoint slide.

Recommended Websites for Free Pictures:
Our sample slide features images from Unsplash, a website that offers high-quality free photos. You can also check out Pexels and Pixabay for more free image options.
How to Crop Inserted Pictures in PowerPoint:
Cropping a picture in PowerPoint is useful to exclude unwanted areas. Pictures can be cropped manually or to prebuilt/custom shapes as well. When done correctly, it can enhance the visual appearance. To crop a picture, first select it, then from the picture format tab click on the crop option. However, we have covered how to crop a picture in PowerPoint in another article that you may check as well.
Get a Printable PDF of this Article
Similar to our other PowerPoint how-to articles, you have the option to download a printable PDF of this step-by-step guide on how to insert a picture in PowerPoint.
Frequently Asked Questions
Here we have tried to answer some of your questions about how to insert pictures in PowerPoint slides.
How to insert a video inside a PowerPoint slide?
You can copy and paste or simply drag and drop the video file onto the PowerPoint slide, similar to how we inserted pictures. Alternatively, you can go to the Insert tab, click on Video, and select the video from your device.
Can I save my PowerPoint slide as an Image?
Yes, you can your PowerPoint slide as an image. The process is straightforward. Use the “Save As” option and select either JPG or PNG file format from the dropdown menu. Once you click on “OK”, you will be prompted to save either the current slide or all slides. If you want to save only the current slide as a picture, select the “just this slide” option.
Premium Member
Unlock exclusive and premium templates of PowerPoint School!
Hi there! We’re Team PowerPoint School. Become our premium member on Patreon and unlock exclusive access to all our premium templates.


Leave a Comment